
What is Maceration?
In terms of cleaning bones, maceration is the process of using naturally occurring anaerobic (don't need air) bacteria in water to decompose flesh, ligaments, and tendons to leave us with nearly clean bones.
What Materials are Needed to Clean an Animal Skeleton with Maceration?
- Dead Animal- Skinned, Gutted, and Mostly Fleshed
- A Container that can be sealed
- Water
- Gloves
- Scalpel and Blades
- Recommended: Aquarium Heater or Bucket Heater
- Recommended: Strainer to Not Lose Bones
- Optional: Respirator or Vick's VapoRub for the Bad Smell
When to Use Maceration
Maceration causes ALL bones to come apart and makes teeth fall out, so it is not recommended for small animals if you plan on articulating them. The smallest I have macerated and then articulated was a squirrel, and seeing those tiny carpals and tarsals (wrist and ankle bones) was extremely hard. I'll make another post on how to clean small animals soon.
Maceration is known as one of the worst smells on this planet. The stench will travel quite a ways, and will stick on your skin for several days, so it is not recommended to use maceration if you live close to people that will be bothered by the smell.
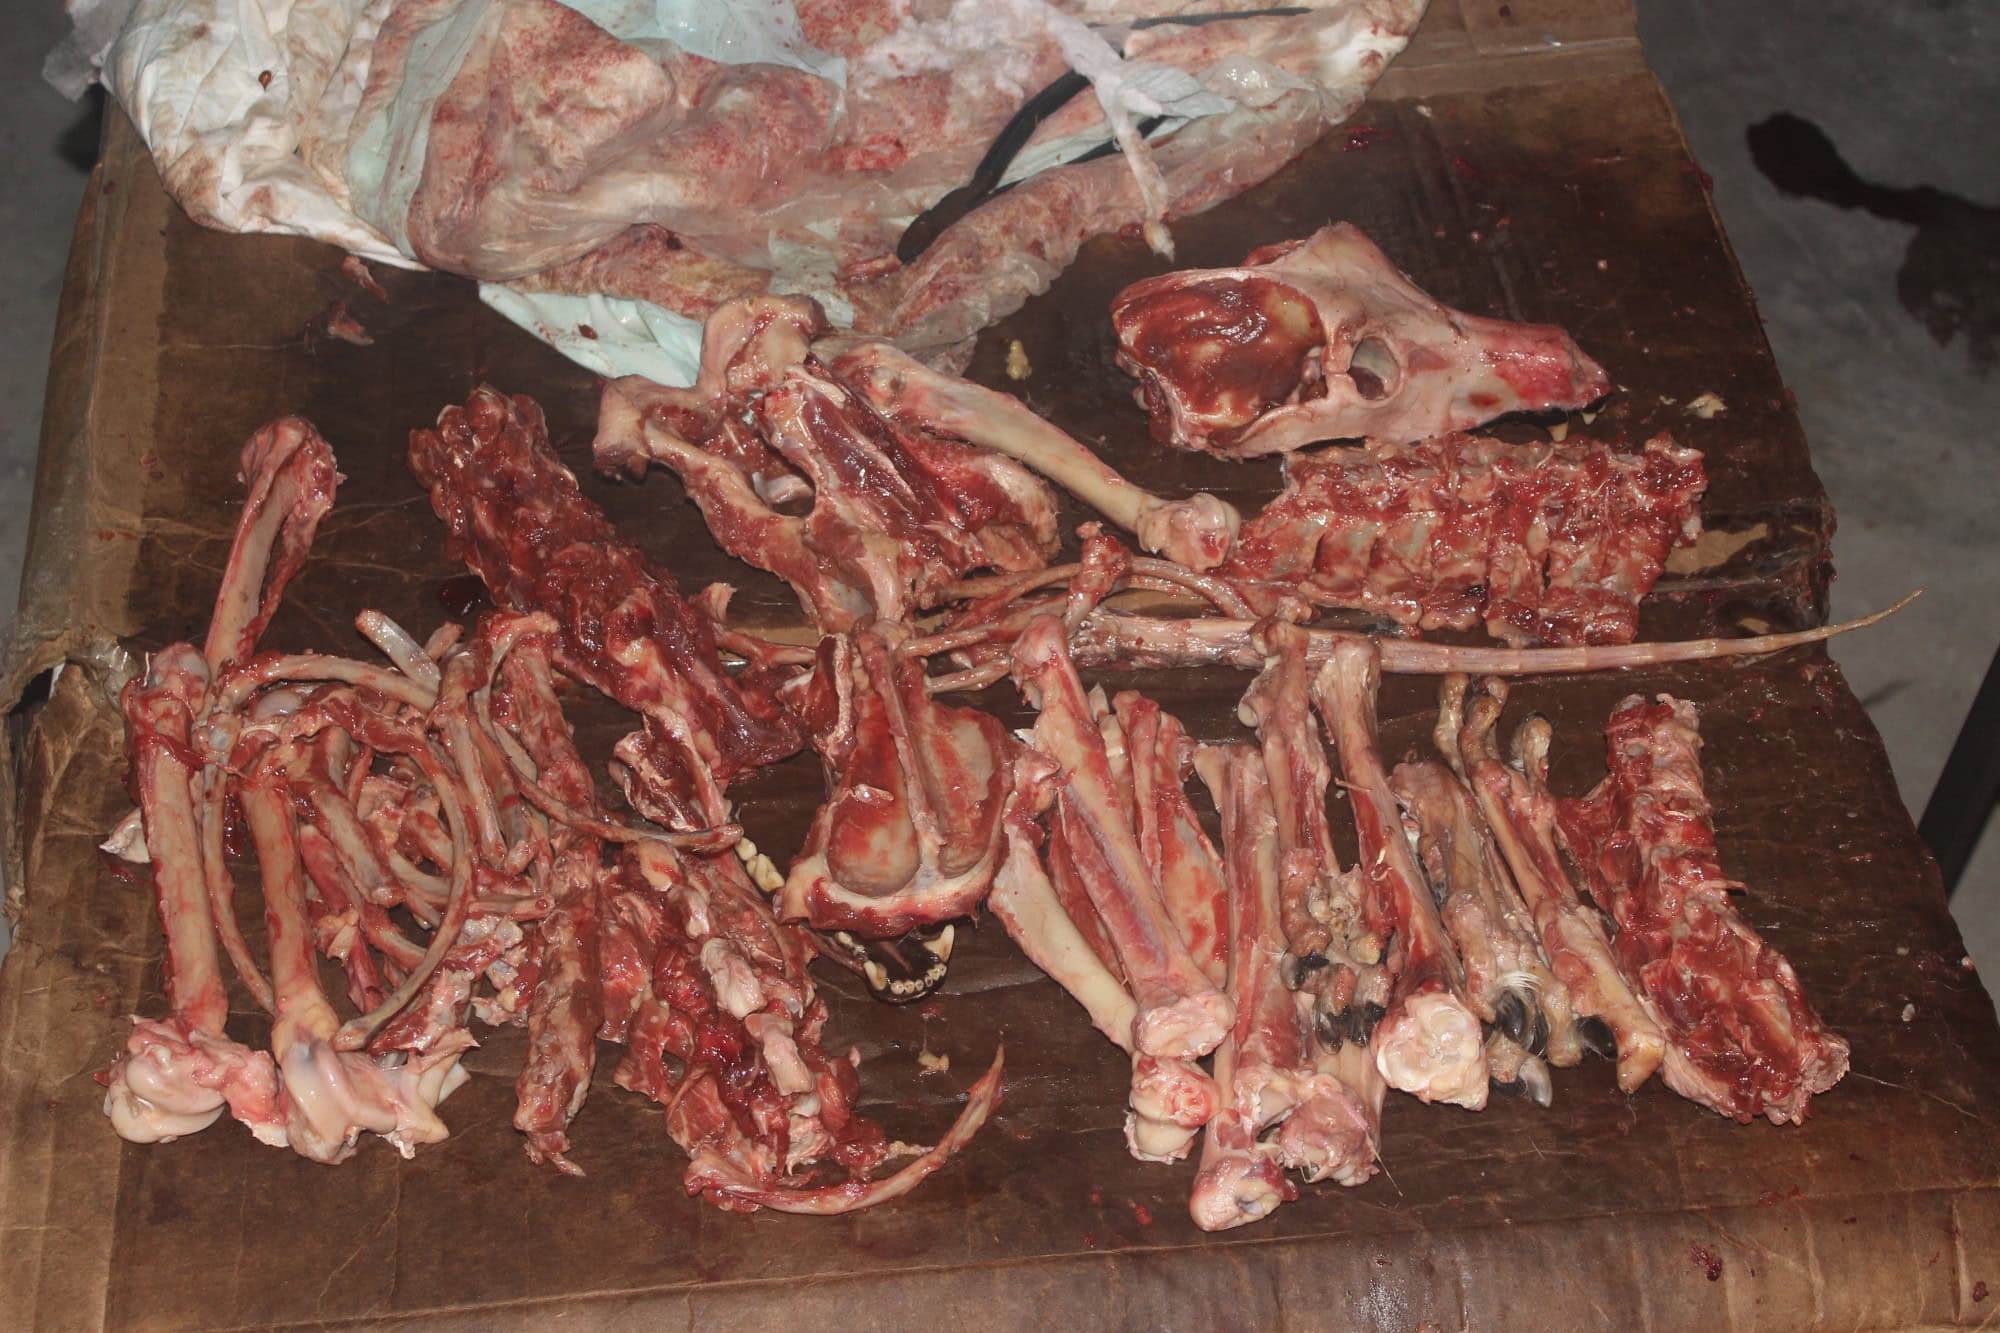
How to Prepare an Animal for Macerating
If you're starting with a full animal, you have a good bit of work to do before you should start macerating.
1. You'll want to skin the animal. Macerating a full animal with skin on will take months, and it still won't be clean, so don't be lazy. Get out a knife and skin it. Pick up a gross roadkill animal and don't want to skin it? Don't be a baby. Skin it.
2. Gut it. Guts are gross, but they'll make a big mess when dumping, so it's best to remove them all. Eyes, lungs, heart, and all other organs need to be removed. They can be taken out all at once (excluding eyes) if you have some skill/experience.
3. The second most important part if you want to macerate things quickly- fleshing! This is often the step that people skip or slack on, and is why it takes them a few months to macerate things where it only takes me a week- two weeks tops. The more meat that's left on the bones, the longer it'll take to be broken down by the bacteria. Fleshing well also reduces the chance of adipocere ("grave wax") from accumulating on the bones.
- Get a scalpel and cut off the head, cut out the tongue, and remove as much meat from the head as possible. Then remove the brain. This can be done with a brain blaster (you can click here to read how to build your own), or by using a tool (scalpel, forceps, skewer, or anything else) to slosh the brains around, and then gently wash them out with water via faucet or hose. The pressure from the water should force the bits of brains out and down the drain.
- Cut off the front legs by going behind the shoulder blade, but be careful not to damage the clavicle (collar bone) if the animal has them.
- Then cut along the sides of the top of the spine and remove the back muscles.
- Cut between the ribs and cut off the costal cartilage (the cartilage that attaches the ribs to the sternum)- it's white and can easily be seen from inside the rib cage. A pair of wire snips or scissors are sometimes needed to cut through it. Maceration will break it down, but it'll turn the consistency of coral and won't be usable, so it's less to sort through later if you remove it now. Remember to not throw away the sternum! Cut the cartilage off of it and put the sternum in your maceration container.
- Remove the back legs by finding the ball joint of the hip and cutting behind/around it. There's one strong ligament attaching to it on the inside, and once you cut it the femur should pop out of the socket.
- Cut all large muscles off of the front and back legs. Remove the meat from the back of the shoulder blades, the two large chucks on each side of the ridge on the scapulae, cut to the side of the humerus (upper arm bone) and peel back the muscle. You'll have to cut a bunch of tendons at the shoulder joint to get the muscles to free. Cut along the upper and lower side of the ulna or radius (forearm bones) and remove that meat. Then remove the meat and ligaments on the bottom and tops of the paws/hands. Repeat these same steps for the back legs. Be careful not to remove the patellas (knee caps) when fleshing the legs.
Prepping The Death Bucket
- The best way, and the way I currently use, is with a heater. You can use an aquarium heater, but that requires getting the heater yucky, and some heaters require you to override their temperature controls, which seems unsafe to me, so I used a thing called a Pail Heater. It wraps around the outside of a 5gal bucket, and has a built in thermostat. The thermostat is in Celsius, so you'll have to do conversions. The heater is a bit pricey ($50-60), but they last a very long time (I never had one burn out) and work very well. Ideally you want the temperature anywhere between 80-115F (26.6-46C) If you forget that the thermostat is in Celcius and accidentally set it to 80-115C you will melt your bucket and potentially start a fire. At 115F (46C) the bacteria will not be killed, and the bones will not be damaged.... We'll cover temperatures more when we get to Degreasing. Just know to NOT BOIL OR SIMMER the animal to clean the bones.
- If you don't have a heater, you can keep the container outside in the sun during the warm months. Painting the container black will help keep it warm. The cons to this method is the container will cool at night, and the bacteria are most efficient at constant temperatures. It'll still work, just slower.
- No heat! Known as cold water maceration, as long as it remains at least 60F+ (15.5C+), it'll still work, just very slowly. This means you can technically macerate things just by bringing the container inside, but I do not recommend it. This method can take months to clean, and the lack of heat will increase the chances of adipocere (grave wax) on the bones.
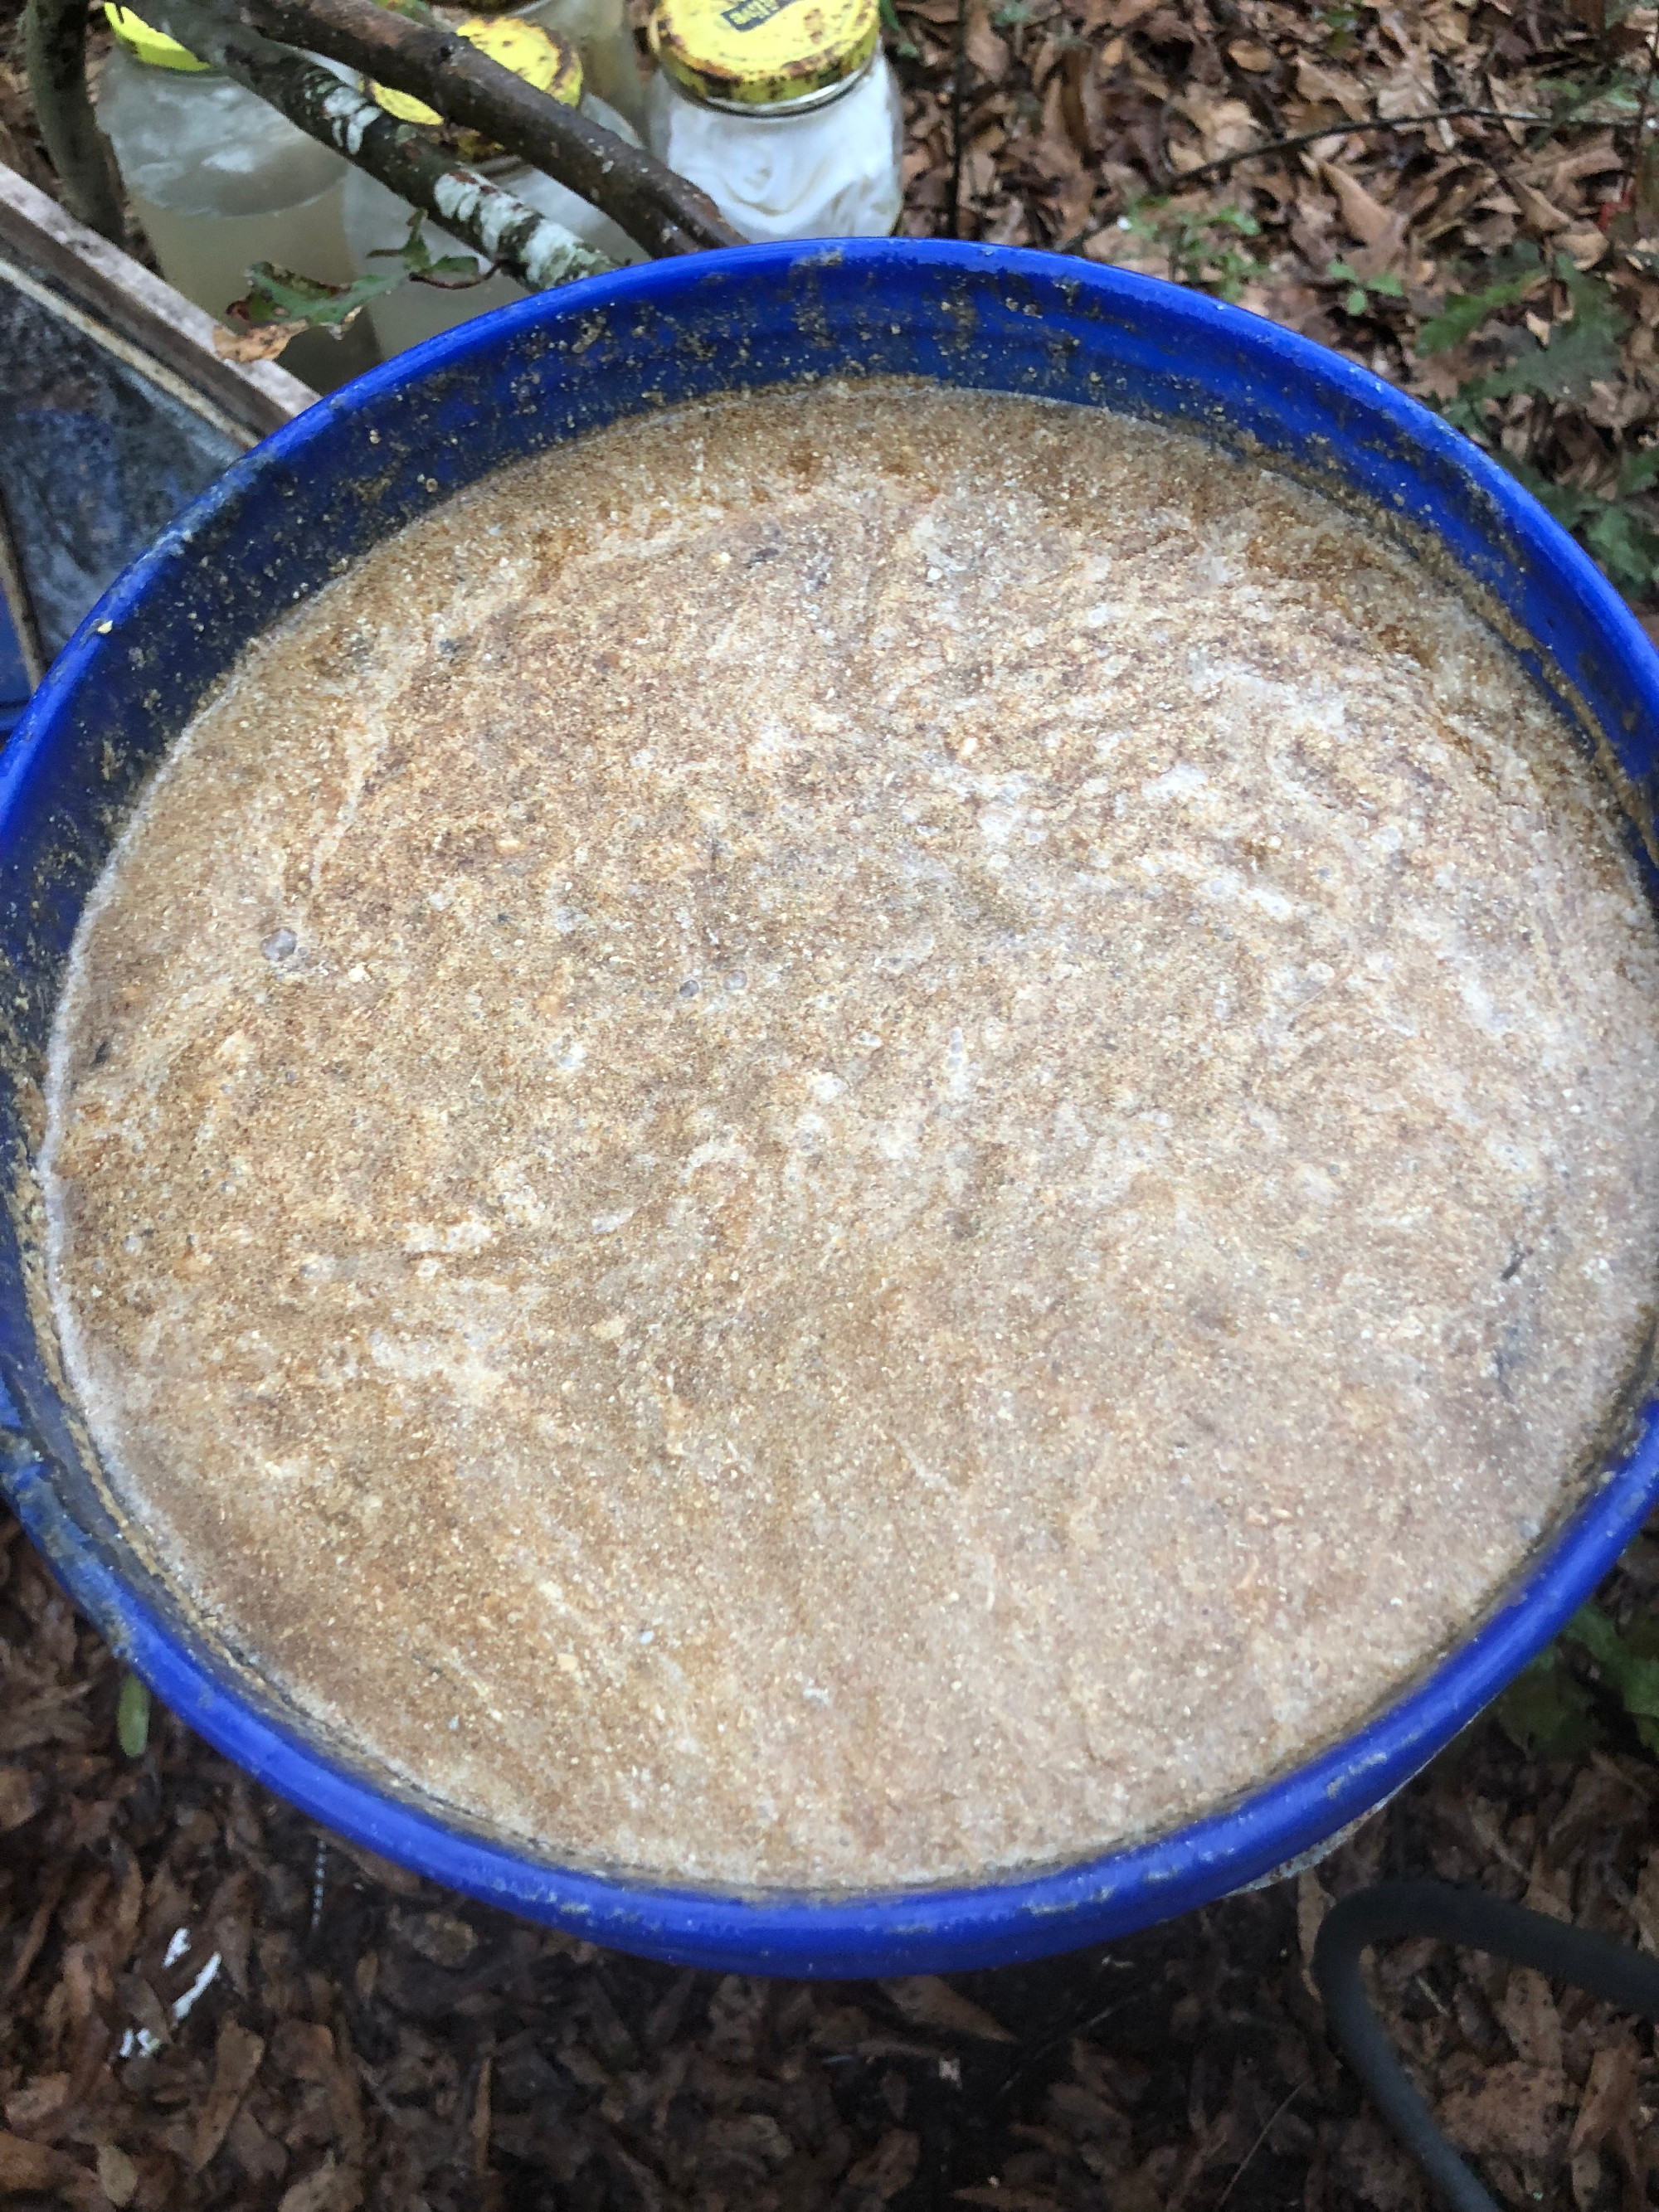
How / Where / When to Dump Maceration Buckets
- My current dumping setup in my new studio has plumbing, but I know most people won't have that luxury. What I used to use was a 5gal bucket, an about 10' long 3" pipe in an L shape, and a hole. I cut a 3" hole in the bottom of the bucket and siliconed it to the shorter end of the L shaped pipe. I then had another 5gal bucket that I drilled small holes in the bottom of that I'd place in the first bucket. The top bucket was used as a secondary strainer to not lose bones/teeth. At the end of the pipe I dug a decent sized hole where the maceration goo could land. It would be absorbed into the soil by the next time I dumped. I'd dump my goo in the top bucket, the liquid would go through the holes into the second bucket, then through the hole, down the long pipe (far away from me) and land in the hole. Kept me clean and my workplace less smelly.
- A simpler setup is to dig a temporary hole. Dump your goo in there (make sure to use a screen or strainer so you don't lose bones) and then fill the hole back in when you're done. This is good for the smell, and can be used almost anywhere.
- Another option is to use it as fertilizer! Maceration is just decomposed animal matter, water, and bacteria, which is great for plants! Make sure not to dump it directly on any produce that you'll be eating (potatoes, carrots, or anything else grown under the ground) and make sure not to splash it on any foliage or produce that you plan on eating.
- You can also dump directly into a toilet. I would never do this, as it would stink up your entire house for DAYS, but it can be done if needed. Once again, use a strainer to make sure you don't lose any bone/teeth. It's just bacteria and decomposed meat, so it won't hurt your plumbing or septic.
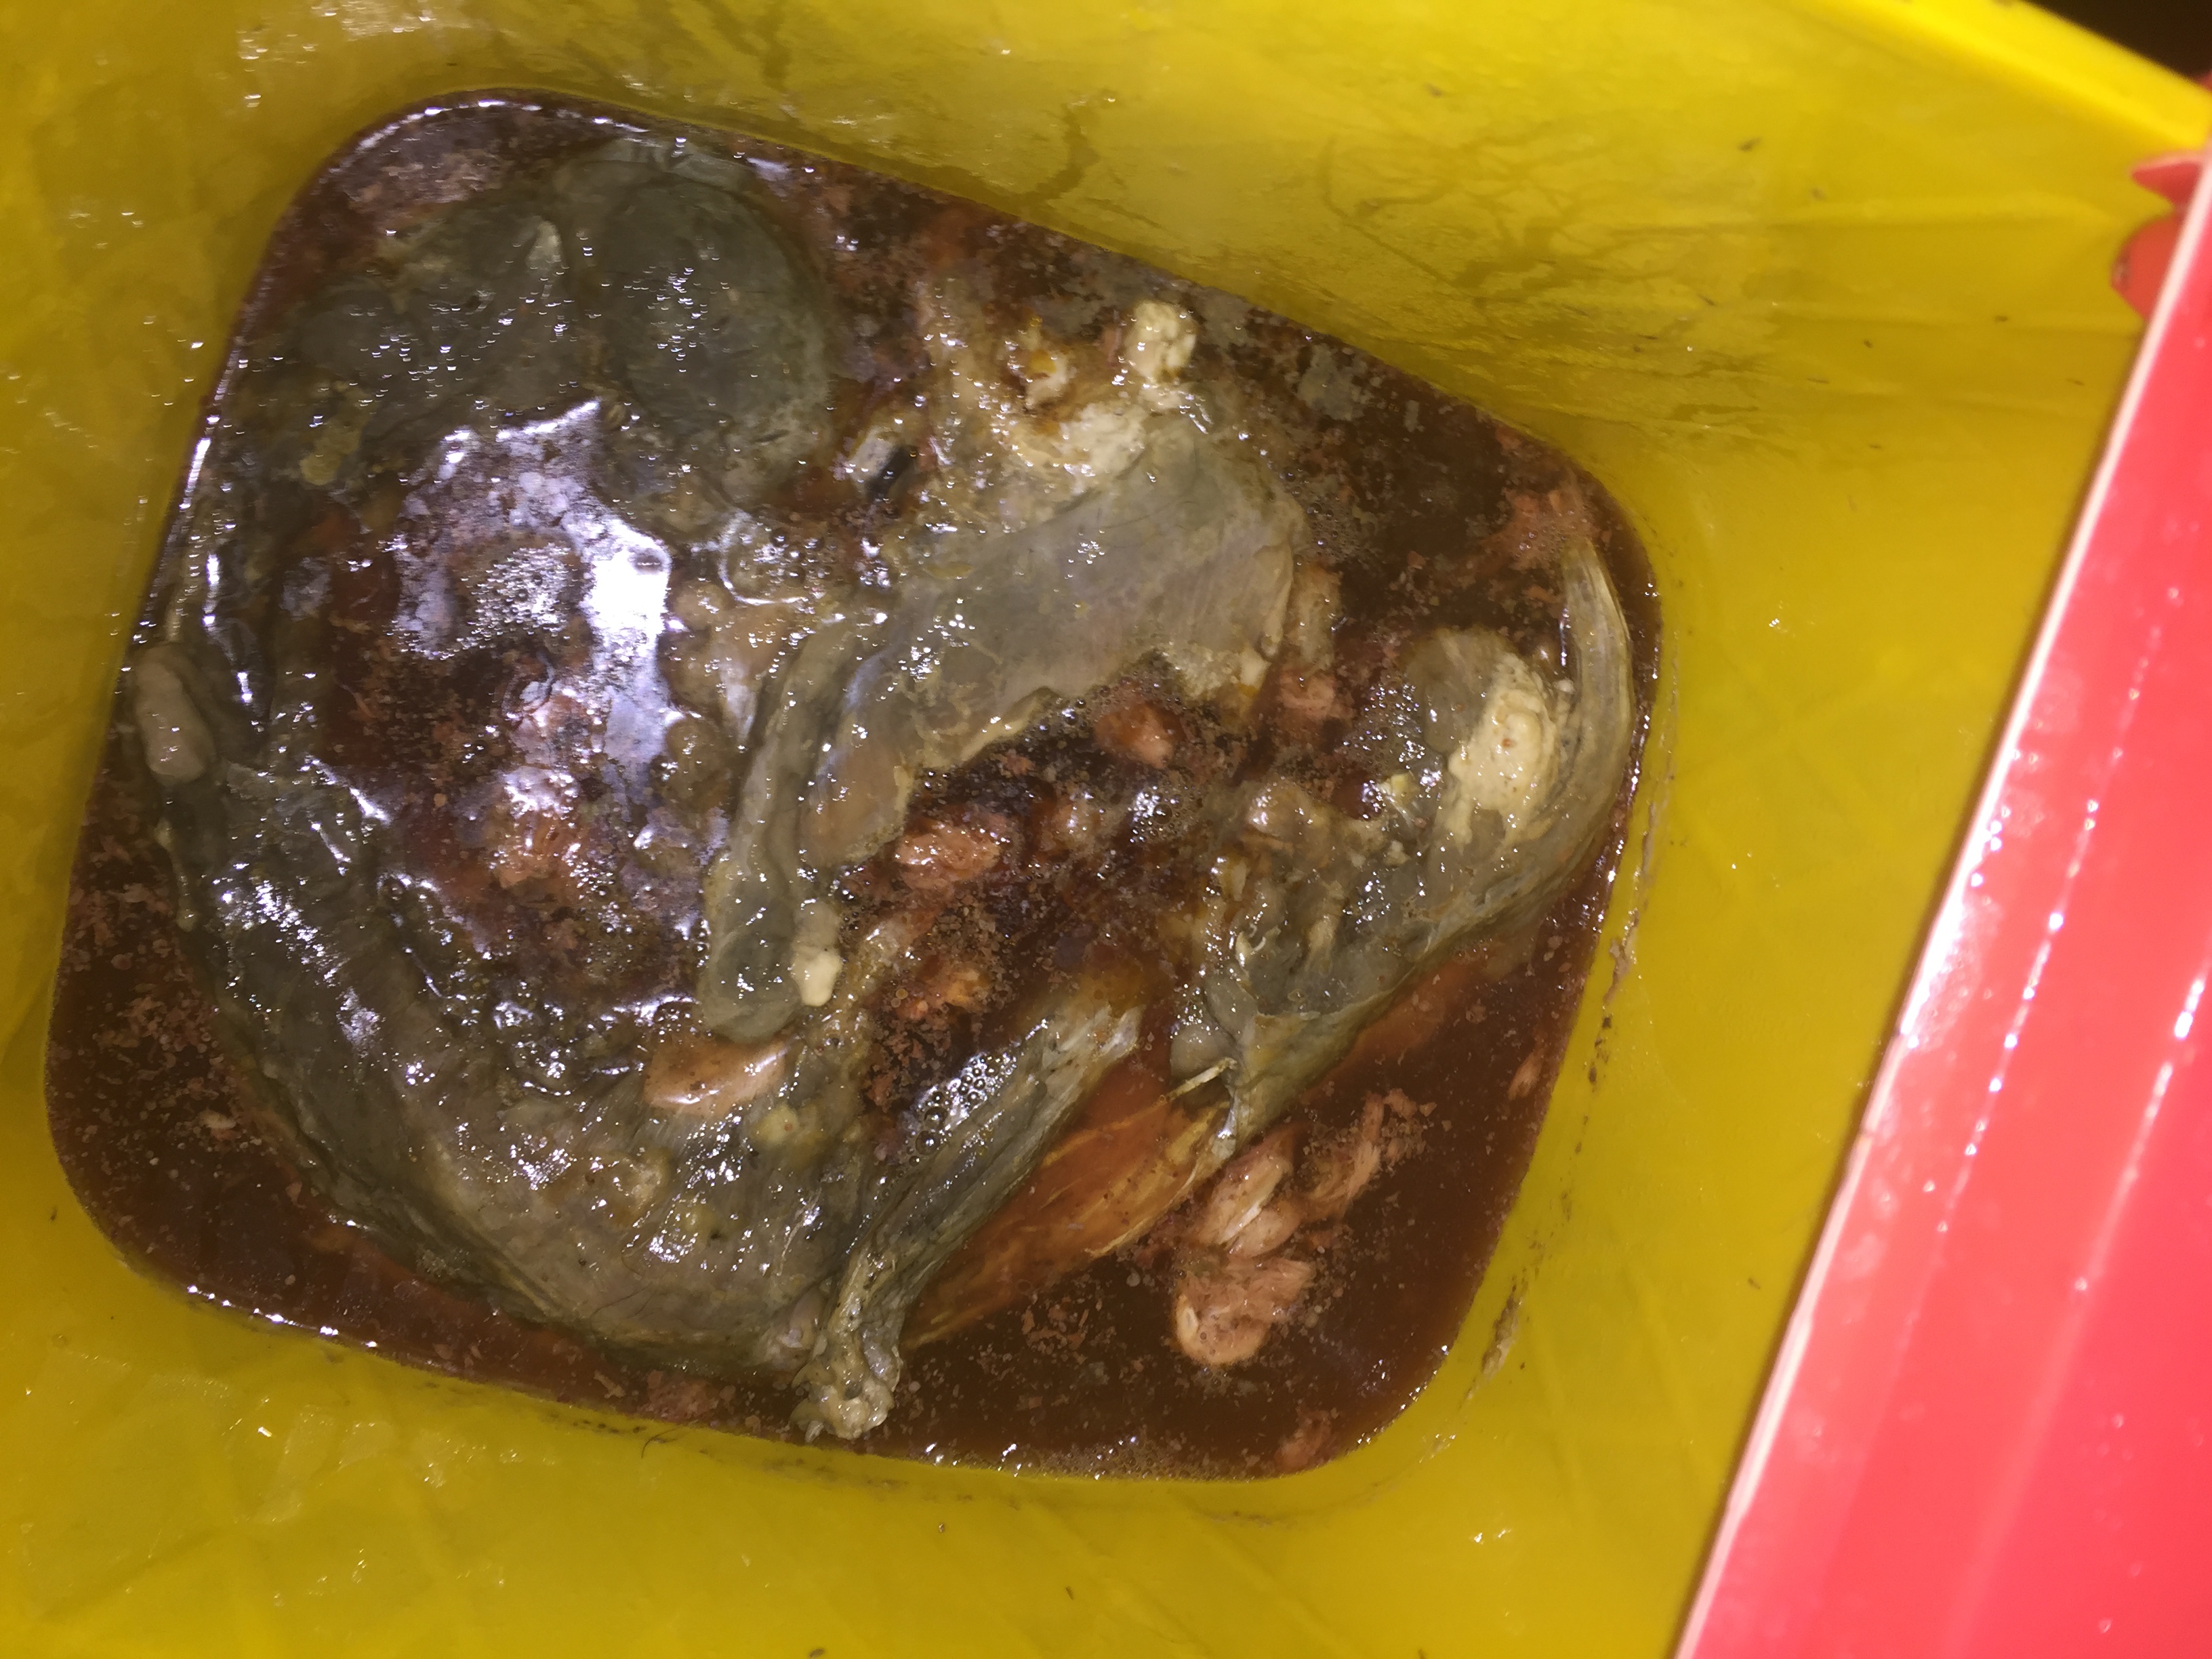
If you notice that there's still meat/ligaments left on the animal when you're dumping, don't dump all of the liquid out. Leave a small amount left (25% will definitely do) and refill the container. This will help not kill off the bacteria and will help finish up macerating. Let it sit for another week or two, and then dump again. Repeat until the bones are flesh free.
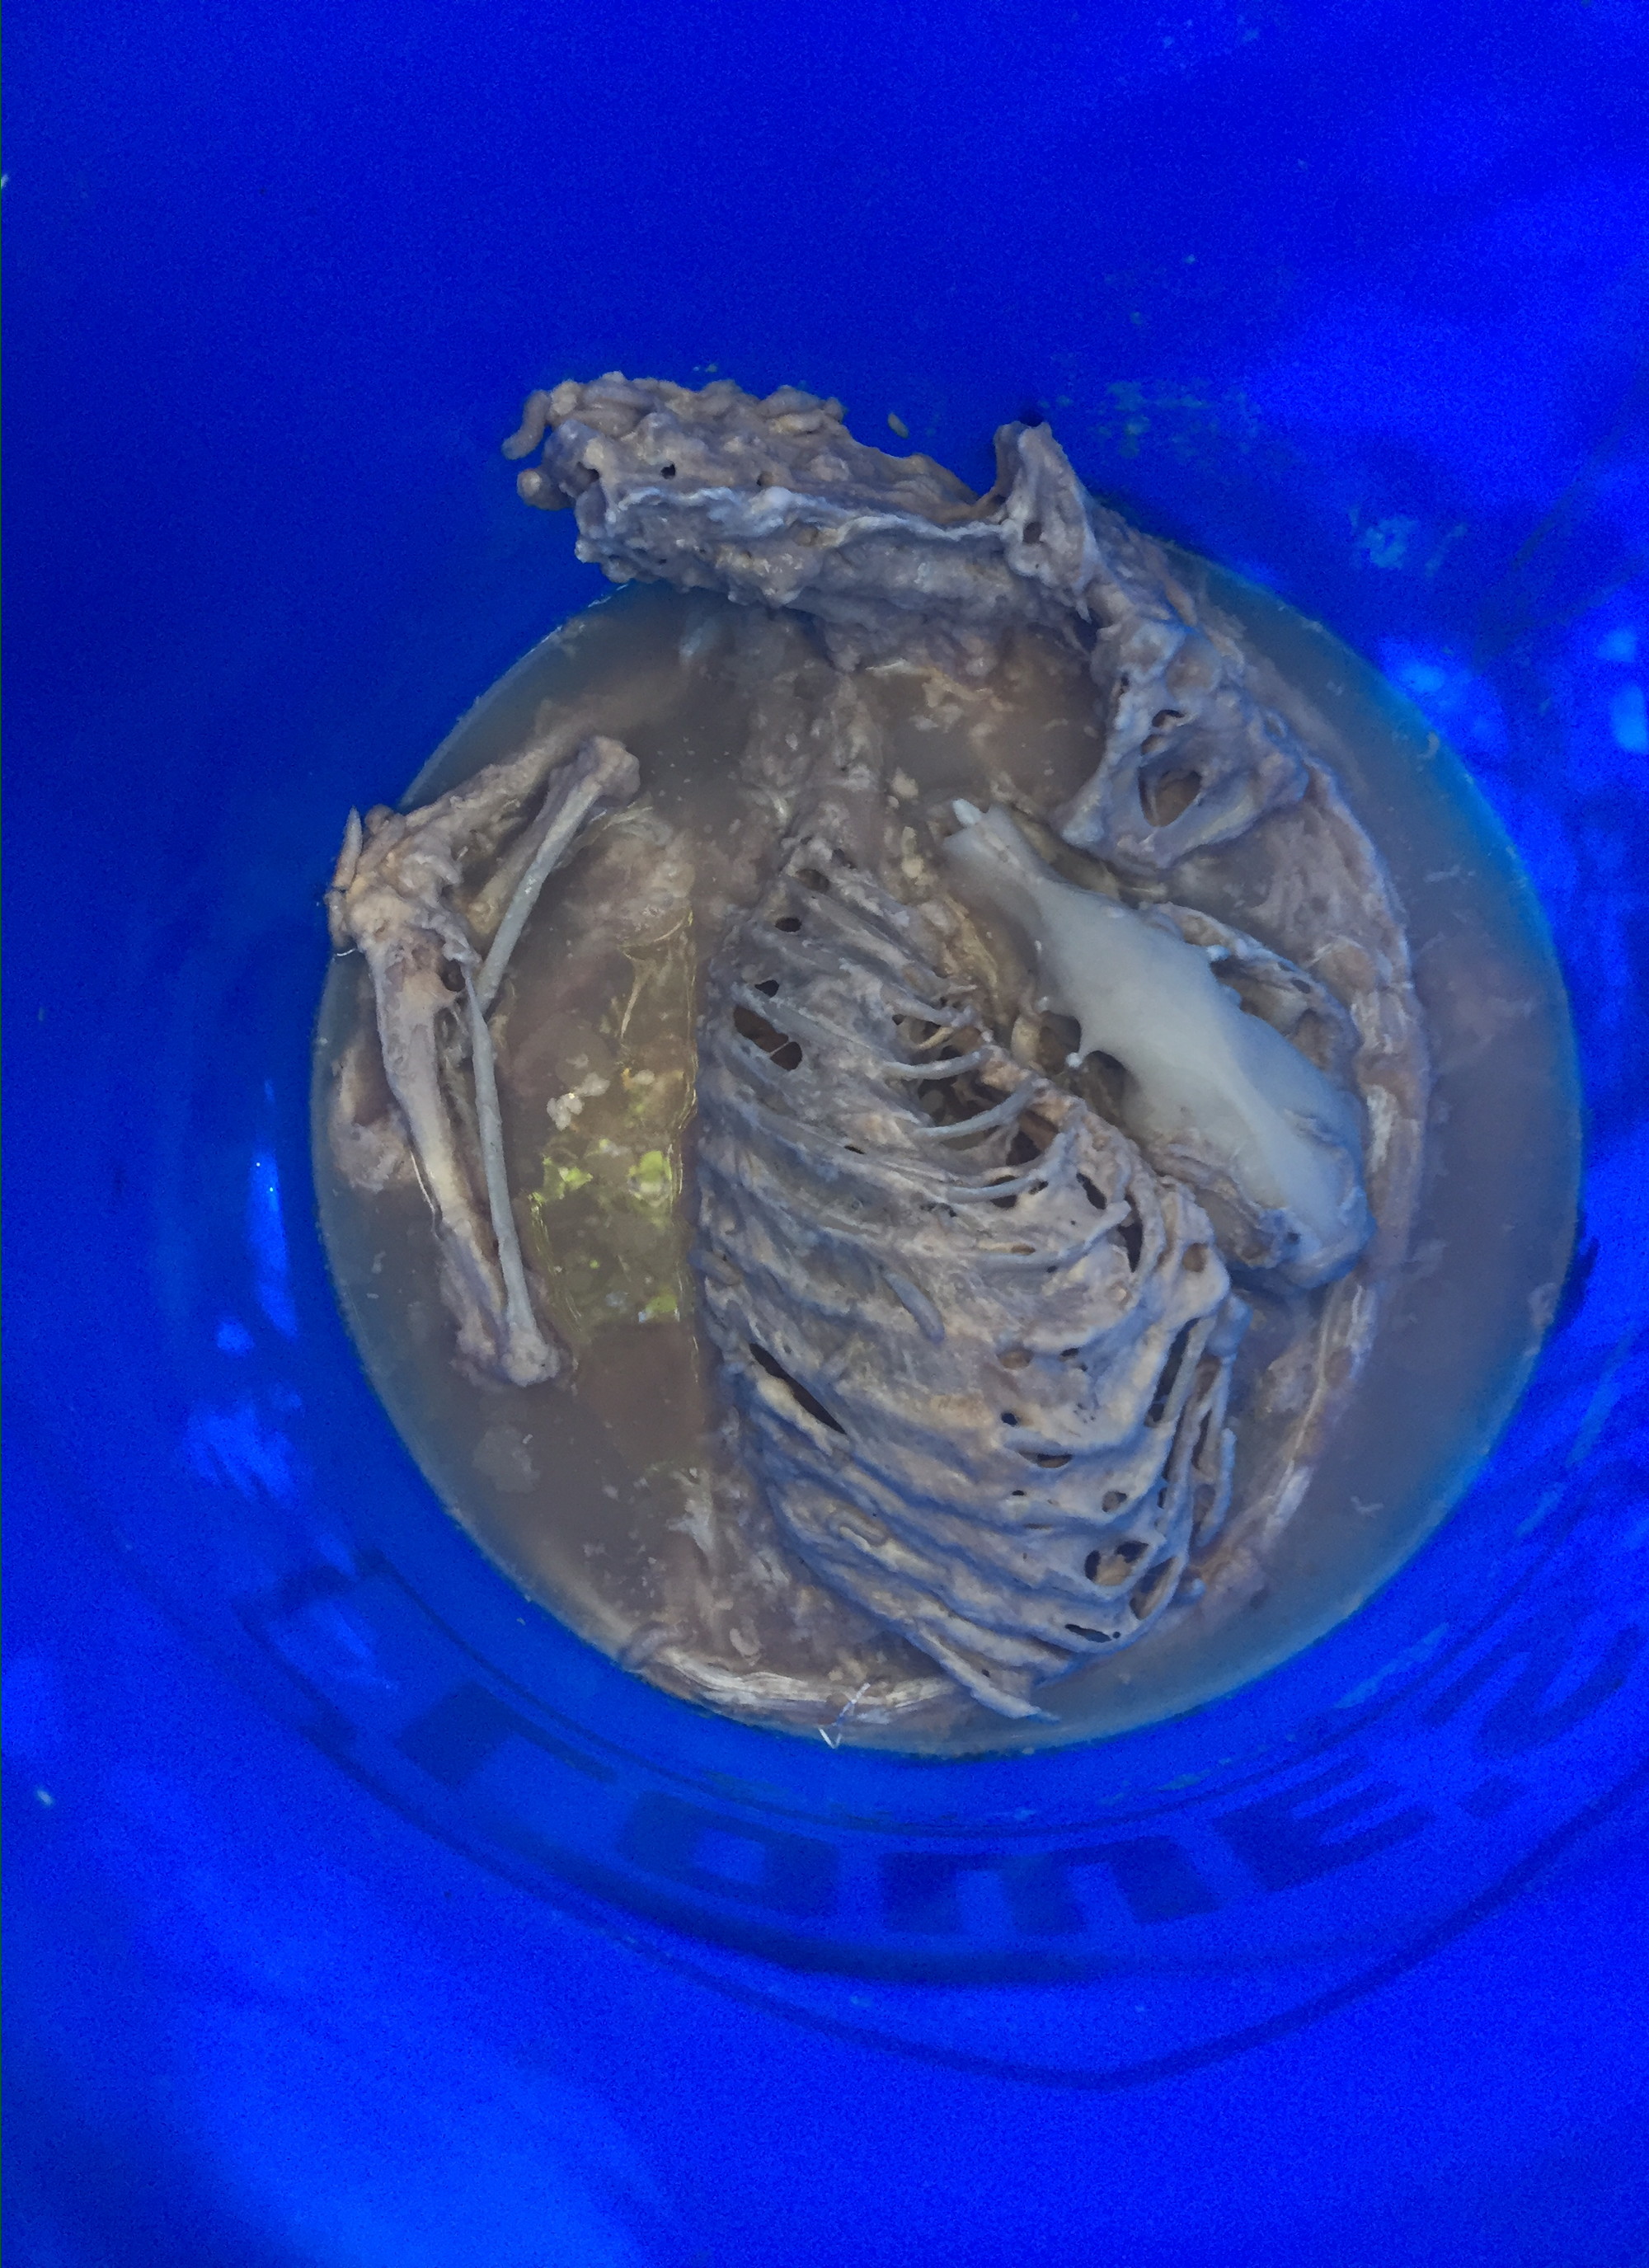
If the bones look mostly flesh free and are no longer connected to each other, use a water hose to rinse them off and dump again. This rinsing will get a lot of the remaining gunk off the bones and let you see if they're done macerating. If they look like the next picture, they're done macerating and ready to begin degreasing. If you see a white substance on some bones, you need to read How to Remove Adipocere/Grave Wax

What Do I Do Now?
If your bones are now flesh free, you're ready to start degreasing them! Go on over to the next article, Degreasing 101!
If you found this article helpful, feel free to leave a comment down below or share it with your friends! I don't get anything directly from making these guides, but it saves me time answering questions and helps you all so I'll continue to do it! I don't ask for/accept donations, but feel free to grab something small from my Shop or follow me on my social media (Instagram, Facebook, or Tumblr) if you'd like to support my work!
If you noticed any typos while reading this, any links don’t work, or have any suggestions or questions that weren’t covered in this article or the other articles on my Blog, please leave a comment below or Contact Me.


Do the sealed buckets themselves smell? My plan was too keep them in the barn and then take them down to the back of our property to dump. I don’t think my mom would be super happy if they smelled up the barn.
If it’s completely sealed, there should be very very minimal smell. Just DO NOT open the bucket in the barn, because then it will absolutely smell.
At the beginning of this post you mentioned not using this method for small animals. What is the preferred method you used for anything squirrel, rat, or smaller? I plan to clean mouse in pretty decent numbers.
At the beginning of this post you mentioned not using this method for small animals. What is the preferred method you used for anything squirrel, rat, or smaller?
If you intend on articulating them, I would recommend using beetles. That’s the best way to keep the tiny bones mostly together during the cleaning process. -Dalton
I plan on using the skulls mostly. I may try maceration and see how it goes. Or get myself a nice cage setup and try just natural decomp.
I got bear skull from my uncle that he left it outside for a year to decompose. It still have these little dried tissue around it, do I still need macerate to remove all dried stuff and degrease?
Yes, maceration will be perfect door getting the dried tissue off, then degrease and whiten and you should have a nice clean skull! -Dalton
I have noticed when my buckets are not sealed I get these little white worm looking things in my bucket. They completely filled the brain cavity of a racoon.... my bucket is heated to about 85*F.
Any thoughts?
Sounds like maggots! Next time remove the brain before macerating (will cut down on degreasing too), and try to keep the buckets sealed. The maggots wont necessarily hurt anything, but they can pupate in the nasal cavity and get stuck. Also not fun to have flies all over the place
Why is not recommended to simmer or boil skulls?
I’ve just begun my journey with skulls. I’ve been bringing water to a simmer, lowering the heat a bit, and then leaving skulls in at 10 or 5 min increments. This has only been done with several fish skulls and so far I have not had any negative effects.
I will be working with wild boar and axis dear skulls in the near future as well so I’d like to commentate the animals in the best way possible.
Thank you and Aloha.
Hey Andre,
I plan on writing a separate article on the WRONG ways to process bones eventually, but the simple answer to your question is it causes irreversible damage. Bone is primarily made of calcium phosphate and collagen. Collagen provides a flexible network for the strong calcium phosphate to bind to, as by itself calcium phosphate is quite brittle.
Collagen starts melting at about 160°F, and the deterioration rapidly increases once you read about 180°F. If you’re boiling/simmering skulls at 212°F, you are absolutely destroying the collagen fibers in the bone, leaving you with a fragile calcium phosphate shell that can easily break, crack, peel, etc.
The other negative is the fact that high temperatures like those involved in simmering and boiling actually force grease deeper into the bone, making degreasing nearly impossible and take much much much longer.
Beetling or macerating does not damage the collagen in the bone, and macerating actually begins degreasing the bone at the same time it defleshes it.
Hope this answers your question!
-Dalton from OddArticulations, LLC
Do you recommend maceration on snake head?
Pythons and smaller colubrids.
If you are experienced/confident that you can piece them back together, sure. If you don’t like puzzles, I’d say no. They will absolutely fall apart (number of pieces varies by age), but will prove incredibly challenging to someone without experience. Beetles would be the preferred method of cleaning if you want to keep them mostly together.
-Dalton from OddArticulations, LLC
You're awesome, thanks for all the knowledge!!!
I have the bucket heater mentioned, but I'm not sure what temperature to set since it turns off after reaching it. How would I keep it at a constant temp? My bucket has a lid, but doesn't seal completely. What do you recommend? Thank you in advance!
Hey Gabe,
The heater cycles on and off to maintain whatever temperature you set it on. I use mine for degreasing in a 14 gallon barrel and have it set slightly below 50°C (122°F). If you’re using it to macerate I’d recommend less, probably around 35°C. Hope this helps!
Dalton from OddArticulations, LLC
Hey there, I was looking to add to my "collection" of skulls and skeletons, And my cat very kindly brought me a shrew. I am only looking to keep the skull as the cat damaged most of the body. It is quite tiny, and will be the smallest I own. I noticed that you said in the post not to use this type of maceration on small animals as it makes the teeth fall out, But I have not been able to find a post on your blog where you explain how to clean small and delicate animals. I would really appreciate if you could get back to me soon with a link to the post or some advice as the body is really starting to smell. Thank you in advance.
Hi there! Beetles would be best for something that small, but from my personal experience moles and shrews tend to not have their teeth fall out, so you might be okay with macerating.
Hope this helps!
-Dalton from OddArticulations, LLC
Hello
I have bought a pails heart, starting to macerated a skull,
If I red correctly I should have the temperature at 80/90F for best results,
And change the water 25% every week
Thanks
Hi! Yes that protocol will work fine, and as long as the head was fleshed well it should be completely flesh-free after a week or two macerating. Best of luck! -Dalton
Thanks for the quick reply, maceration whit pail heater work like a charm,
I only had one problem one of my skull an otter the teeth turned black,
What happens, and how can I clean it
Thanks
That’s usually from the bacteria dying (completely normal), and it’ll clear up once you degrease and whiten the skull. Glad to hear you’ve successfully completed the first step of skull cleaning!! Congrats!
Thank you for your well written blog very very helpful, glad I found it, and followed you advance
Advice*
Hello!
I once macerated a bunch of beaver heads in my bathroom. there was huge gas release and the lid popped off multiple times a day even thought it was a very tight fit.
the bucket was next to a very hot radiator. even tho the water temperature was bacteria paradise it took a month before they were clean. how do you succeed to clean in a week?
is there a way to macerate indoors without smell?
Hello! This guide walks you through step by step of exactly how I macerate in a week. I’ve never had a lid pop off. Your problem sounds like it may have been caused by not enough heat and/or not enough fleshing. Sealed buckets don’t smell much, but as soon as you take off the lid the smell is unavoidable. I don’t macerate in my house so I cannot help further, sorry! -Dalton
Just wanted to give you a huge thank you for taking the time to document all of this. Your details and photos are really helpful. Reviewing your other entries absolutely cracked me up. I love people in this weird, bone realm who have a good sense of humor.
Thanks again, man!
Thanks for all of the great information you have provided. I just received a walrus skull and am going to begin the task of cleaning it. It has been fleshed by the Inuit hunter, but I think I can get more off. It is currently frozen. Doing all of my research before getting started. I live in the city, I cannot imagine I will be week liked by the neighbours once I start with maceration. Hoping that if I can clean as much as possible prior to immersion that it may keep some odour down.
I'm (extremely) new to this so I was wondering how you gut a raccoon (and/or opossum, though I imagine it's very similiar)? Every time I look it up, it's always talking about eating the meat and never explains it in a way that makes sense to me. Thanks!
(p.s, thanks very much for this article, it explained a lot to me and I hope to put my new knowledge to use soon)
Hi! Once the animal is skinned you’ll simply cut into the abdomen (but not pierce any organs), and then cut around the rib cage and through the diaphragm. You can then use your hands to begin separating the membranes from the inner lining of the chest cavity and simply pull out the lungs/heart and then the rest of the organs. Last step is to sever the colon, and that’s the only part that should be messy/stinky (disregarding blood, of course)
Cool, thank you! This is far more helpful than the other things I've gotten as answers when googling it, I appreciate it!
Here's an interesting newer, and essentially odor-free approach: enzymatic maceration.
I've had excellent results in achieving thorough maceration in just a day or two on small to medium-sized skulls with virtually no unpleasant odor. I see no reason it couldn't be scaled up to handle any larger skull.
I use the protein-digesting enzyme Bromelain, which is extracted from pineapples. It is widely available as Adolph's Meat Tenderizer. Other store brand meat tenderizers are formulated with a similar proteolytic enzyme, Papain, which is extracted from Papayas. This should also work similarly.
I just add maybe a teaspoon full of Adolph's per gallon for a markedly accelerated maceration. Ideally, the water should be hot- maybe 110-120 degrees F, as that speeds up the enzyme activity. The hot water from a faucet is close to this preferred temperature.
Change out the enzyme bath solution as needed with fresh enzyme, and remove as much of the released tissue from the bath as you can so the enzyme can focus on attacking just the adhering target tissues. I haven't yet had an opportunity to try it on a larger skull, but am planning to do it on a coyote head this week as soon as I receive it.
Hi,
I wish I had seen your site before I started...
I buried the ground squirrel head before skinning it; maggots took care of most of the soft tissue, but pretty much ignored the skin and connective tissue. Needless to say it was/is a mess, a lot of stuff thoroughly stuck to the bone. I've been macerating it in water but the outdoor temps aren't very warm yet so progress has been slow. I was wondering if you have experimented with digestive enzymes? Lypase digests fats, protease and Bromelain digest protein (in the body they need to be at body temp - 98.6 - to fully work so I don't know if they would work without additional, controlled heat). Also, there is betadine hydrochloride (an artificial stomach acid). I am hesitant to use a knife to remove the connective tissue and I really don't want to cause damage, I don't know how delicate bones are.
I see that the previous person, Dan Heck, has tried bromelain with success... anyone else?
Thanks,
Trish B
Hey Trish,
I don’t personally have experience using added enzymes, but I know bromelain and papain are both very commonly used by Europeans who process bones. I do think you’d need additional heat to benefit from them, but it’s something that you can easily test out and report back to us for future reference! I would steer clear of the hydrochloride, as your hydrochlorides are usually not friendly to bone. Another option would be to add a piece of raw meat to your Maceration container to help restart the bacteria culture. Best of luck!
This is SUCH A RESOURCE!!! Thank you so, so much for this info. I'm working on my first deer skull and I've been following your recommendations to a T! It's working beautifully- I'm using a pail heater to keep temperature steady and after a week I have nearly perfectly clean skull! I'm giving it one more week just for nooks and crannies before I head to your page on degreasing 🙂 Thanks for this Dalton!!
First off, I wanted to thank you for documenting all of this. I, like many visitors to your blog, am quite new to this, and your straightforward and thorough approach has been extremely helpful.
Now for my question, if you will. I've mostly been working with raccoons, opossum, animals of that size that have met unfortunate fates on the road. If they were separated in some way- I bought some mesh bags that were advertised to hold produce, to be specific- could you macerate more than one animal in a five gallon container? I don't have a terrible amount of space nor funds, so I hope to use tactics that help save room and money- plus I've learned that in my area there's many animals available, so it would be nice to be able to do more than one or two at a time.
And my second question, how fast do your particular bucket heaters heat up? Because of my job I have ready access to large jars for free, but I'm not sure if heat maceration would work with the glass.
I'm not sure whether this blog is still active or not, but even if you don't answer, I hope you see this and understand how invaluable a resource your guides have been. Thank you for all the aid you've done towards this community I've found myself a part of! I wish you all the best.
Hey Lee,
I’m glad the guides are proving useful so far! You *can* macerate in those bags, but it gets very very messy. I recommend macerating in separate jars (see note below) and then transferring to the mesh bags for degreasing. In degreasing you can have many many skeletons in one bucket (in separate bags)
The bucket heaters get hot quick, but it’ll vary how long it takes for your jar/bucket/barrel to heat depending on the size, type, content temp, etc. If you’re wanting to use one heater to process many separate things simultaneously I would recommend using the “double boiler” method, that is heating on larger container of clean water and having multiple smaller containers inside (with your specimens inside each). Your heater will heat the clean water, which will heat your smaller containers and subsequently your nasty water in those. Glass works fine, just avoid going from hot to cold quickly or you may shatter them
Best of luck on your journey!
-Dalton
Not sure if this is a version of maceration or not but I use maggots for the initial cleaning. I put full heads. Cows, bison, yak in old deep freezes in the bush. Maggots have them mostly meat free in about 3 weeks in the summer. I bring them home and pressure wash them. After that I soak in water and scrub/pressure wash 3-4 more times before peroxide. This has worked well for me but not sure exactly what to call the method.
I know you don't recommend it but will it work for a small dog or cat that isn't skinned? If so, what would that procedure entail? Thank you!
Thanks for this really informative post! I've got lots of deer bones in a box outside which I found in the forest. A fair bit of ligaments and flesh attached so chose the cold water method. I've returned to see the water it pink and a film of pink is around the sides of the box- I assume this is bacteria? Will it harm the bones? Do I need to get rid of it?
Thanks so much for sharing your knowledge!
I’ve macerated a few things in summer - smaller birds. But doing a much larger bird (Turkey) in Fall or Autumn as we call it down here in New Zealand.
So got an aquarium heater. It goes up to 36 C (97 F)
I stripped it really well. It’s been in 3 weeks and all that is left are some tendons and ligaments.
I also noticed the lower leg bones look red (marrow)?
I was going to put it in for 2 weeks more just to be sure. I suppose I could cut off the tendons etc with a scalpel? I thought no harm in macerating a bit longer as it will work on the marrow and start degreasing.
Thanks
Craig.
Hey Craig,
I’m glad to hear all is going well! You’re absolutely correct that the red is from marrow and bacteria- it’ll be further removed in the degreasing and whitening steps. Some birds ligaments ossify (turn to bone), so they may not break down like other tissue during maceration. You can certainly clip/cut them off when needed
Sounds like you’re on the right track, though! I wish you the best of luck with your turkey and wish you a happy autumn!
Thanks so much. This website has been a great resource to help me with maceration. I’m a paleontologist by training. Doing it in my spare time and I just find skeletons fascinating. The variations on the theme that happen with different ways of living and feeding.
I think someone else asked if you had a patreon or something for us yo say thanks for the resource. Otherwise I can look and see if there is anything I can buy to support your business. But getting animal products into NZ can be tricky!